
Modern Monograms Tutorial
Putting together this series made me realise how many bloggers out there are sewing for their sons, and today we have another creative lady: Abby from Things for Boys (but don’t be fooled – there’s more than just boy stuff on her blog…but you’ll have to check it out to see all the great stuff!). And here’s her Boy’s Own Style project:
Hi everyone, I’m Abby from Things for Boys and I’m very excited to be posting here today as part of ‘Boy’s Own Style Month’. I think it’s great that so many people want to give the boys in their lives something that little bit special…it’s why I started my blog!
I came up with the concept of ‘Modern Monogramming’ pretty quickly, but it took a while for my actual idea to take shape. Monograms are a fun way to personalise clothes and they don’t need to look like they belong on the corner of a handkerchief. My modern take is based on Stencil Graffiti and uses a big oversized monogram to really make a point!
You don’t need to be super crafty or have a lot of tools to put this together. You will probably have most things on hand. I bought the ink pad on eBay for a few dollars.
I used Rae’s Flashback Skinny Tee for my pattern. Stamp the design onto the cut out pieces before you sew them up. If you don’t have the sewing skills to make a top, just buy a plain one to decorate. Put a piece of card in the middle of the top to catch any ink that might run through.
If you’re lucky enough to own a Cricut or Silhouette, then making the stencil will be very quick. I don’t have one, so I’ll show you the old school way to make it.
Stencil Graffiti Monogram
You’ll need:
A top
Fabric suitable Ink Pad – I use VersaCraft cubes
Letter stamps or other design to decorate your monogram*
Craft supplies
First off, your fabric or tee should be pre-washed. This will remove any sizing to make sure the ink sets really well. Iron your dry fabric or top so it is nice and flat.
I made up my Monogram in Word. You want to pick a fairly plain font and play around with the size until you’re happy with it. You can print it out and hold it over your top to make sure.
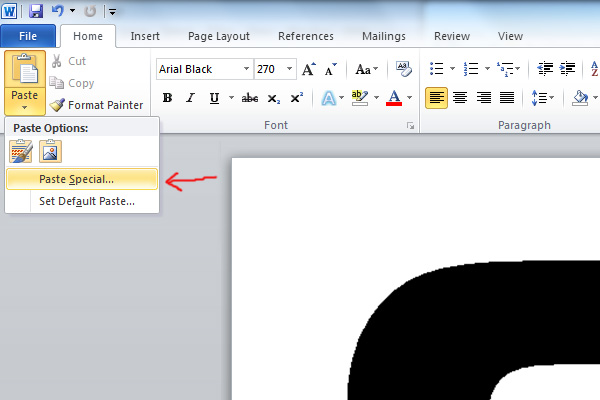
Mirroring the first letter looks great, particularly if your little one has double initials. If you want to reverse one of the letters then here’s how:
– When you’re happy with the look and size, highlight the letter and copy it (Ctrl C).
– Next you need to paste it as an image. Go to ‘Paste Special’ (from the Paste Menu) and choose ‘Picture (Enhanced Metafile)’. This will paste the letter as an image.
– Use the ‘Crop’ function from the ‘Format Menu’ to remove any extra white space around your letter.
– Use the ‘Rotate’ function to mirror the letter.
You many find that you need to paste both letters as images to get them to line up vertically.

When you’re done designing, print it out. Regular paper is fine. Then, cut out the letters using a craft knife. Use a ruler as a guide on any straight lines. If you’re letters have ‘holes’ in them, cut them out too.
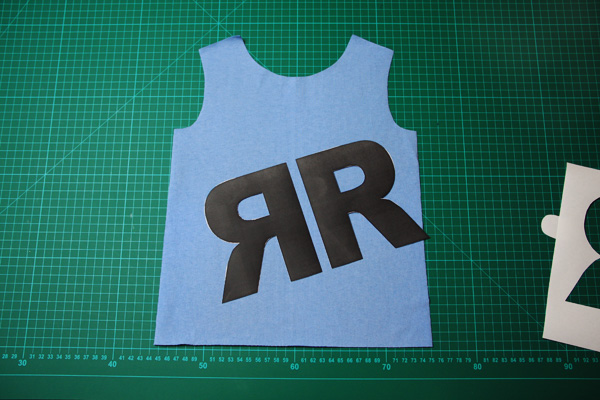
Position the letters on your t shirt and decide on where you want them.
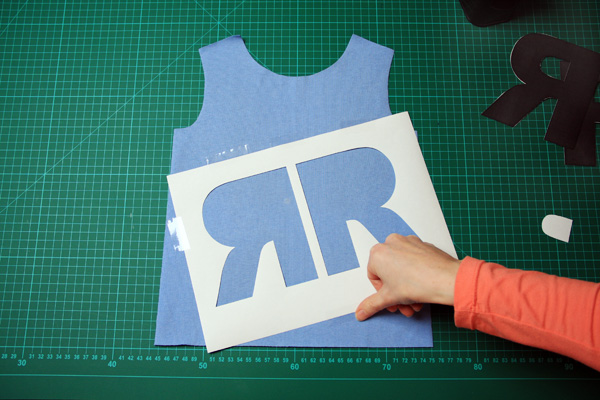
Put your stencil over the top of the letters. Take the letters out and then use sticky tape to attach the stencil to the t shirt.
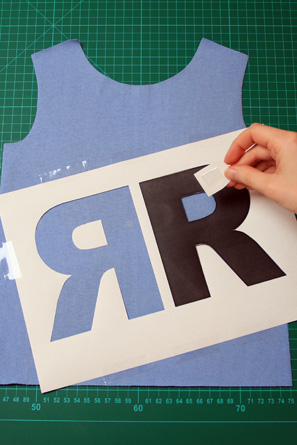
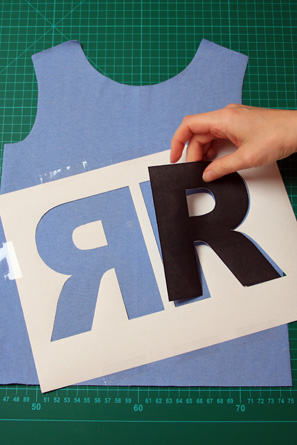
If your letters have holes, apply double sided tape or a loop of sticky tape to the back of the holes. Put the cut out letter in the stencil and then stick the ‘hole’ down where it needs to go. Carefully remove the letters.
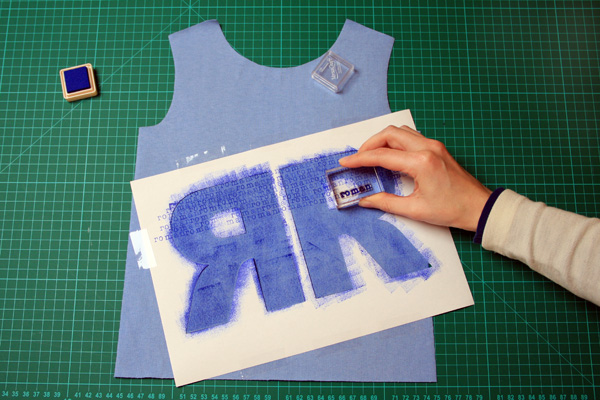
Use several light taps to ink your stamp rather than one big push.
Test out the ink on a scrap of the fabric or a piece of paper.
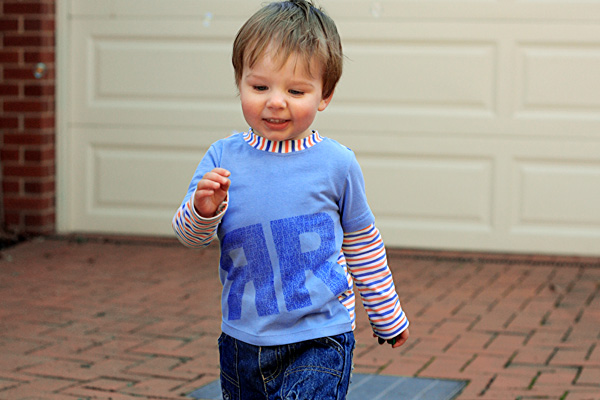
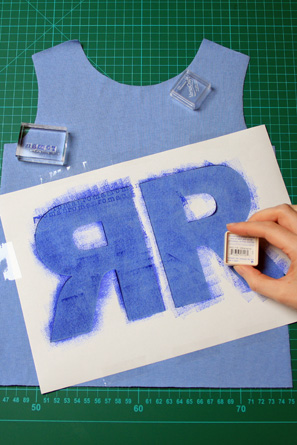
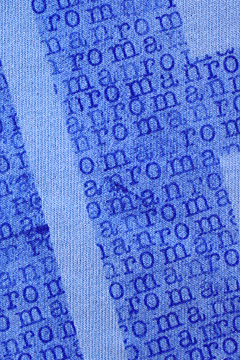
Now get stamping! For my design, I lightly stamped the ink pad directly onto the fabric to darken the background and distress it a bit. I wasn’t worried that it looked a bit uneven. You can see in the picture above right that it has added a little colour to the fabric. Put extra paper around the sides if you think you might go off the outside edges of the stencil.
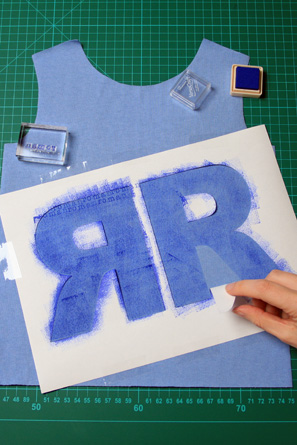
I then used my alphabet stamps to stamp ‘roman’ all over the monogram. Keep going and have fun!
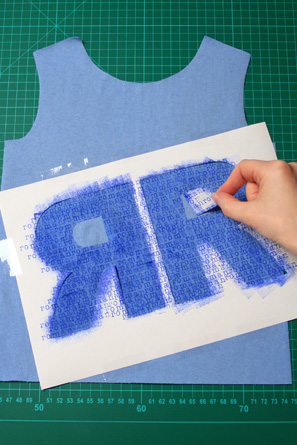
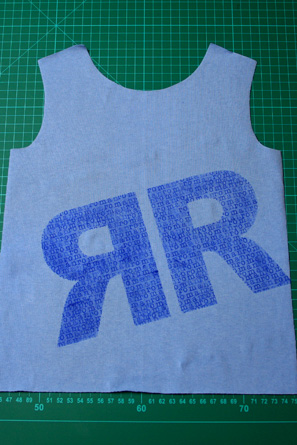
When you’re finished, carefully remove any ‘holes’ and then your stencil. To set the ink permanently, h
eat set with an iron on dry, using a pressing cloth. I find that the pressing cloth does get a bit of transfer on it. Use hottest iron setting that is recommended for the fabric and press for about 2 minutes, moving the iron around. For best results, iron on both sides. To prevent fading, allow the ink to set for a week or two before washing.
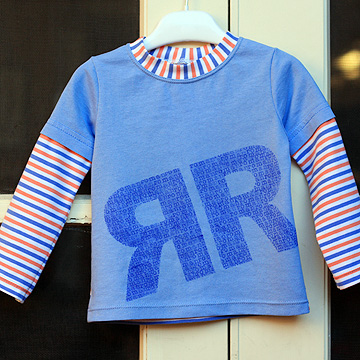
If you’ve done this on a completed top, then you’re finished! If not, get over to your sewing machine and put your top together!
*You don’t need to use letters to decorate the monogram. Any fun stamp will look great. Even the rubber end of a pencil could be used to add polka dots.
If you like this tutorial then please take a moment to like me on Facebook or follow me on Twitter to keep up to date with thingsforboys.
Thanks Narelle for asking me to participate in Boy’s Own Style Month! It’s been lots of fun and I’ve really enjoyed seeing everyone’s projects!
Thanks again Abby! I love the extra layer of texture/interest that the stamping gives the monogram. Definitely worth the extra effort. Looks like I’m going to have to add a stamping kit to my craft supplies!
This turned out so great!! Love it!! You think up the best things, Abby. Roman is so adorable! janelle
I love this idea, very stylish and really modern. I’ve got to get some fabric ink stamps. I agree Janelle – Roman is adorable.
I absolutely love how you did this and want about a billion of my own clothes to have MY name on them. I am definitely following along via GFC and adding these to my to do list.
You recently followed me on Twitter. So glad I came over to check out your blog.
Rosie x
craftbotics.blogspot.com
Love the double layered stamping — so cool!
Thank you so much for this post. I want to let you know that I posted a link to your blog in Creative Busy Bee Craft Inspirations, under the Page 4 post on Aug. 13, 2012. Thanks again.