Tutorial: Felt Car Play Mat-House
Who can we find behind the doors and windows of this little red house?
Open it up…
…and what do we see…
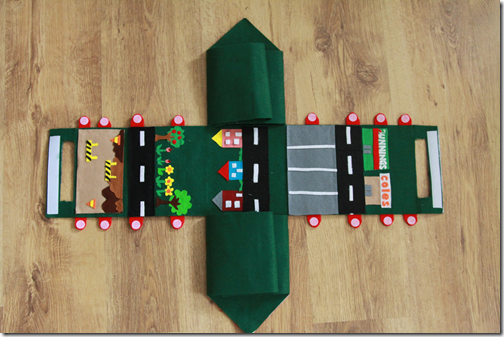
…and a whole little world awaits:
Here’s how to make a felt play mat that folds into a house:
Materials:
25×30 inch (62.5 x 75cm) piece of green craft felt
2 sheets of red felt
1 sheet of blue felt
Medium weight iron-on interfacing
Sheets/scraps of different colours of felt
Tacky craft glue
Velcro
Scissors
Quilters chalk
Thread, sewing machine or needle to hand sew
Instructions:
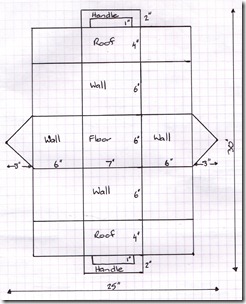
I started with a sketch of the layout (sorry, no fancy drafting software here ), and worked out the dimensions based on the green felt I’d bought by the metre at my local craft chain. (For some reason, I’m working in inches here although I grew up with metric system – go figure!)
Mark the layout from the sketch onto the felt with chalk and cut around the outside.
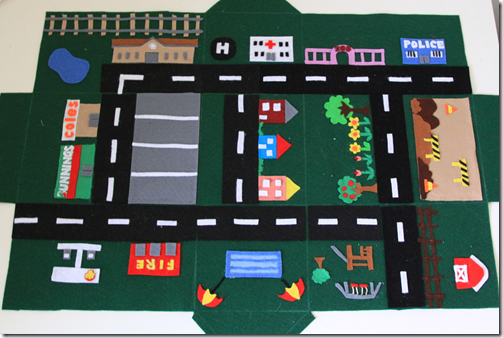
Cut out long black strips approximately 2 inches wide for the roads (I went with straight roads rather than curvy roads for simplicity, but go crazy with what suits you!). Arrange on the play mat and glue in place. Cut out 1/2 inch wide strips of white felt for the centre lines on the road, and glue in place. (Sorry, no progress photos here – I’m sure you can imagine!)
Cut out various buildings etc from different coloured felt pieces and glue in place (when you’re happy with the layout). The play mat will fold up better if you don’t have anything stuck across the fold lines (which I had marked out in chalk).
I put way too much thought in the layout – Police station as you come into town (as a warning to visitors), petrol station as you leave town, can’t have the hospital next to the construction site (although I’m not sure next to a zoo is that good!), car park across the road from the shops, farm on the edge of town and on and on I went…
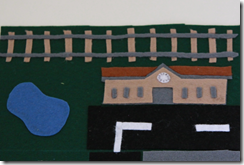
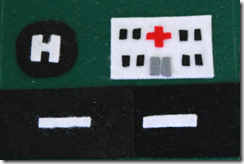
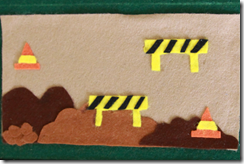
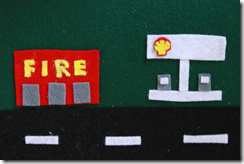
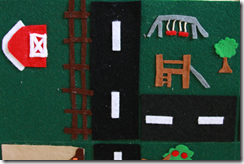
Here are some photos of the details:
I didn’t make templates for any of these, but you should be able to work them out from the pictures. If you’d like any more details or a sketch or two, let me know in the comments or send me an email. I hand cut everything with sewing shears and a craft knife (no fancy cutting machine here!). I used string for the chains on the swing and marked the clock on the train station with a regular ball point pen. Everything else I just cut straight from the felt, or drew on with a quilt chalk pen or disappearing fabric marker before cutting.
A few tips: have a container to put your felt scraps into where you are working and another container for pieces to small to use. I was constantly trimming and those little pieces went everywhere! Also, don’t trim over another piece of felt – that wonderful property of felt sticking to itself is a big nuisance if you do! (Trust me, I made both these mistakes more than once!)
Make cuts along each side of the play mat for the sections that fold up.
Sew strips of Velcro to the handle sections of the green play mat.
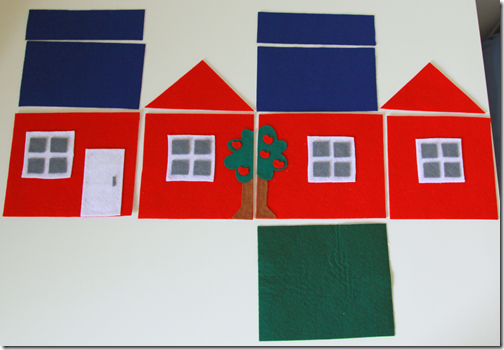
Cut out 2 pieces 6×7 inch and 2 pieces 6×6 inch in red felt for the outside walls. Cut out 2 pieces 4×6 inch and 2 pieces 2×6 inch in blue felt for the roof and handle. Cut out 1 piece 6×7 inch to reinforce the floor. Cut and iron on medium weight interfacing to the red wall, blue roof and green floor pieces.
Cut out pieces of felt for the door, windows and apple tree (and any other embellishments you want) for the outside of the house, and glue in place.
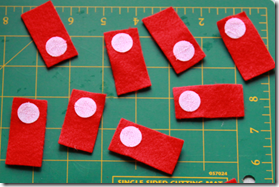
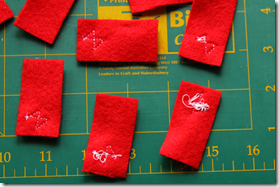
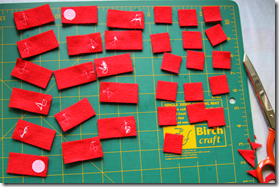
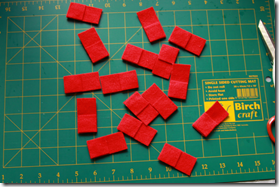
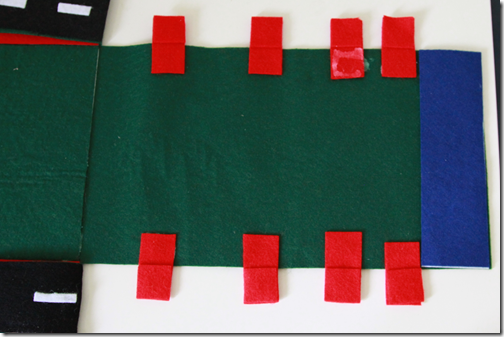
Cut out 16 tabs of red felt (approx. 1inch x 2 inch) for the house closures. Sew Velcro circles to the tabs – the grippy, rough ones that stick to the felt.
I didn’t have any red thread and made a mess of sewing the Velcro on, so I cut out more red felt (1 inch square) to cover my sewing. This is optional!
Glue the tabs in position on the back of the green play mat, and then glue the red walls, blue roof and green floor pieces (all with interfacing) in position.
Cut out the hole of the handle using scissors or a craft knife. I also rounded off the tabs so they weren’t as bulky.
Fold it up into a house, fill with cars and take it somewhere fun to play!
Unfold, get out the cars and start playing.
This play mat was inspired by the one at A Girl and a Glue Gun, the playhouse at Homemade By Jill and the take-along toy barn at Serving Pink Lemonade, as well as heaps of others I’ve seen in blog-land.
It’s a handy take-anywhere bag with plenty of space to carry cars and other toys. As an added bonus, it’s big enough to hold all my son’s cars, making a cute storage box in the playroom!
If you make your own felt play mat-house, please let me know in the comments or send me an email!


![image_thumb[4] image_thumb[4]](http://lh4.ggpht.com/_msLJ4-gOKYI/TWB6J2gQcXI/AAAAAAAACGw/Vm7LVWyLwpQ/image_thumb%5B4%5D_thumb.png?imgmax=800)
![image_thumb[3] image_thumb[3]](http://lh4.ggpht.com/_msLJ4-gOKYI/TWB6MJI_PNI/AAAAAAAACG4/TIVqjBQMMJs/image_thumb%5B3%5D_thumb.png?imgmax=800)
![image_thumb[5] image_thumb[5]](http://lh4.ggpht.com/_msLJ4-gOKYI/TWB6Oeni8dI/AAAAAAAACHA/nlsWX2hi5fw/image_thumb%5B5%5D_thumb.png?imgmax=800)
![image_thumb[6] image_thumb[6]](http://lh4.ggpht.com/_msLJ4-gOKYI/TWB6QsoxccI/AAAAAAAACHI/BxN5_DLmt7E/image_thumb%5B6%5D_thumb.png?imgmax=800)
![image_thumb[7] image_thumb[7]](http://lh5.ggpht.com/_msLJ4-gOKYI/TWB6SmwGSzI/AAAAAAAACHQ/Ev9WS_iD4ZA/image_thumb%5B7%5D_thumb.png?imgmax=800)
![image_thumb[13] image_thumb[13]](http://lh3.ggpht.com/_msLJ4-gOKYI/TWB6WVaNPMI/AAAAAAAACHY/YwFQKvrj24A/image_thumb%5B13%5D_thumb.png?imgmax=800)







![image_thumb[15][1] image_thumb[15][1]](http://lh6.ggpht.com/_msLJ4-gOKYI/TWB81BgBtwI/AAAAAAAACLQ/g_Vals6cHoE/image_thumb%5B15%5D%5B1%5D_thumb%5B4%5D.png?imgmax=800)
![image_thumb[17][1] image_thumb[17][1]](http://lh4.ggpht.com/_msLJ4-gOKYI/TWB83fbe3nI/AAAAAAAACLY/VdRDfmHwIdI/image_thumb%5B17%5D%5B1%5D_thumb%5B3%5D.png?imgmax=800)
![image_thumb[11][1] image_thumb[11][1]](http://lh3.ggpht.com/_msLJ4-gOKYI/TWB86QqpLAI/AAAAAAAACLk/V0PejDs3_gQ/image_thumb%5B11%5D%5B1%5D_thumb%5B2%5D.png?imgmax=800)
![image_thumb[22] image_thumb[22]](http://lh4.ggpht.com/_msLJ4-gOKYI/TWB88tvJQ0I/AAAAAAAACLs/TDiF8uXWVdY/image_thumb%5B22%5D_thumb.png?imgmax=800)
![image_thumb[23] image_thumb[23]](http://lh4.ggpht.com/_msLJ4-gOKYI/TWB8-wAgHlI/AAAAAAAACL0/1w20sIl5VZY/image_thumb%5B23%5D_thumb.png?imgmax=800)
LOVE that! More importantly, I’m pretty sure my boys would be ga-ga over it as well. GREAT job! May have to break into my felt stash and make one.
This is awesome! Wish I had a little one to make it for…going to keep this in mind if I ever need to come up with a present for a child.
Thanks for sharing this with us!
That is completely awesome!!! I’m sure even my daughter would enjoy it! I wish I could get felt by the yard here in Malaysia, but I don’t think I can… I wonder if it would work with another type of fabric for the outside
Oh, I love it. I am so making this. Thank you. My 4 year old is going to LOVE it.
Beautiful project and a great idea!
I’m certeinly going to make this for my 4’th kid’s (son) 2’nd birthday! Big hugs from Poland (Europe 🙂
¡very clever! I want to do it
This is fantastic! What kind of glue did you use???
Wow!! Thanks for sharing! Can’t wait to make one!
This is absolutely amazing! 🙂
featured this on my blog today
kimboscrafts.blogspot.com
Wow, this is AMAZING! Thanks for the brilliant tutorial too. I’m going to try it!
this is awesome!! i’m going to make one for my (car crazy) sons 2nd birthday he is gonna love it!!
I made one! Here it is: http://www.powerfulmothering.com/diy-felt-play-mat/
This is adorable! I will be a “Great-grand-Auntie” soon to a baby boy & this will be the perfect gift! Thank you!
This is such a cute idea. I think I need to make one now!!!
I love this! I’d like to share it on my website that features free patterns and tutorials for crafting with felt, if you wouldn’t mind? I also added your button to my site.
http://www.redroofpatterns.com
I love this, so creative!
I featured it on my blog:
seemesew.blogspot.com
Woahhhhhhhhh! this is SO totally cool!
Visiting from SITS. I saw this yesterday and HAD to go get supplies for it! I don’t care if it’s almost 10 at night! I was way to excited to wait to start this one! Thanks for sharing!!
Mine is not nearly as cute as yours but I hope that my little guy will like it. http://whateverp48.blogspot.com/2011/05/felt-playset.html
wonderful project! i will ty to make one using foam, it´s a shame my daughter is not a boy to play with cars!!!
chanced upon this tutorial and made one for my little man. he simply loved it! thanks for sharing.
http://sewnforyou.wordpress.com/2011/06/16/a-great-craft-a-great-toy-a-great-teaching-tool/
Thats amazing!! Im going to pin it and make one for each of my boys for Christmas. Thanks for the tutorial!!
This is so awesome! I have some felt lying around and a daughter who loves to play…seems like this project should be in my future! Thanks for the great tutorial. http://dontbuyathing.wordpress.com
wow…I’m SO impressed. I love how it holds the cars, provides the whole town and road AND a cute house. Wow.
You did such a great job…and it looks very durable…even for boys! =)
This comment has been removed by the author.
I’m sooo impressed, great job, I want to make it for my son, thanks a lot.
This is so nice idea. The kids will Enjoy this so much.
Car Trailers For Sale
I’m kind of in awe of the amount of work went into this! I linked you up in my Matchbox car DIY post today. My toddler is currently OBSESSED I’m sure he would love something this cool http://onceuponasewingmachine.com/diy-matchbox-car-roundup/
Found this on pinterest and immediately knew I had to make it for my one year old. Thanks so much for tutorial I am off to start on it.
The instructions should read cut the blue (for the roof and handles) SEVEN inches wide, not six. Just wasted time and material, woe. But fantastic tutorial, thank you!
Narelle – I just made one of these for Roman’s birthday. It came out so great I love it! Thank you for the tutorial http://www.thingsforboys.com/2012/10/stash-and-carry-felt-play-mat.html
I’m making one for a Christmas gift and want to include info on how to clean it! Mine is flannel base with eco-friendly felt sewn on/glued on. Any ideas?
It depends on the felt and the glue you use. I’d recommend spot cleaning only (too much time and effort goes into making one of these to risk it getting destroyed in the wash!). Hope this helps. I’d love to see a photo of your finished playmat!
making it now, will post pics:)
Can’t wait to see the pics! Happy New Year!
Thank you! About a month ago my niece entered the “box” stage and your wonderful design inspired me to make her a toddler box for Christmas! Here’s how mine came out: http://pinterest.com/pin/63683782202652409/
I credited and linked to you when I pinned it on Pinterest.
awesome! I love it.
I love it!! and know my lil boy will too!!
Stumbled across this the other day as I was looking for inspiration for a felt car mat. Wish I’d seen it before I’d started mine, as mine doesn’t fold into this nifty house, it just rolls up. But your ideas and layout are awesome! Thanks for the inspiration!!
Thanks for your kind comments. My son still loves his car mat and it’s almost 3 years old now. I hope whoever gets yours loves it too!
Fantastic. A suggestion. Why not make the pattern up as a PDF and sell it on Craftsy.com as a PDF pattern. Or as a paper or PDF pattern on etsy.com
I’m sure me there would be many grandmas like myself who would be dying to make it.
Anne
Thanks for the suggestion, Anne! I’ll look into it, but it would take me some time to get the format right for a pdf. It’s definitely something I’d like to do. Too many ideas, too little time (and two small kids)!
Just started making 1 out of 2 for Christmas gifts for my nephews. So far all is well. I didn’t realize how time consuming cutting the felt town would be. I’m hoping the second one will go a little quicker. Thank you for posting & for your easy to follow directions.
It took me months to finish mine! But then, I was just pottering when I could find time. You can choose how much detail you put into the town, and I went totally over the top. Thanks for letting me know you’re using the tutorial. I’d love to see photos of the finished product.
Thank you so much for this pattern. My latest grandson was born 2 weeks ago 12 weeks premature (doing really well), so I will be storing this pattern to make in about 18mths time.
Hi there!
Thank you for sharing this amazing idea! As soon as I’ve put my eyes on this in pinterest, I knew I’d to do it for my nephew 2nd birthday! How thick was the green felt you’ve used?
Thank you again!
The green felt was the standard acrylic felt my local fabric store sells on the bolt, maybe 2mm thick. It’s not the stiff kind, but having the two layers stuck together makes it stand up reasonably well. I hope you have fun making one for your nephew. I’d love to see pictures!
Making it for my daughter , done with interiors , have to work for outer wall now , thank u so much ….
Adorable! I’m featuring you on my website, http://www.plushiepatterns.com
What a fantastic idea. You could use some liquid stitch on those Velcro dots. I do it works great. Haven’t lost one yet.
I haven’t tried that product before. Thanks for the suggestion Penny!
I love this tutorial! I’ve been using it over the last few weeks as inspiration and help to make my first playmat. If you fancied seeing it, check it out here: http://sewingwhenishouldbedoingotherthings.blogspot.co.uk/
Thanks for sharing Fiona. The question mark section is a great idea. I love seeing other people’s versions!
Hi Im Shaineze Im 11 years old and i started doing your sewing project for my little brother s present.
thank you. you have really broke things down it is really well explained.
Hi Shaineze, I’m so glad you found my tutorial helpful. Thank you for letting me know. I hope your brother loves his play mat (I know my son still loves his). You’re a sweet sister to make one for him!
How big is an piece of red felt that u buy in one piece?
OMG I just came across this and since my son is into playing with his cars and driving them all over the apartment – the walls, chairs etc I am going to try and do this. I love how you didn’t use any fancy cutting stuff etc. I’m off to Michaels today 🙂 Thanks so much for this. Hope I can do it.
Thank You! It is awsome! I start tomorrow to make for my son for 3rd birthday, he loves to play with little cars.
Best Regards from Estonia
Hi Narelle:
I am so grateful you posted this wonderful mat. I am making one now for my little baby Max, he loves cars and I am sure he will love it. this is a wonderful idea and I never seen one before. I absolutely loved it at first sight! thanks for sharing and I will send you some pictures so you can see my project.
Thank you, thank you!
Millie
This car play mat house is genius! I love how everything is put together to form a house and laid down to form a play mat for kids. Little boys will definitely be thrilled about this! I featured your project in my blog because I so love it! http://www.plushiepatterns.com/felt-car-play-mat-house/ Thanks a lot for sharing!
Thanks for the feature!
Love this!! ? I have been looking at things to make my grandchildren and I have found so many things to do on your Website and as a Bonus You are a Fellow Aussie ? Cheers ?
I hope your grandkids enjoy the play-mat as much as my son has. Thanks for stopping by!
How and when did you put the interfacing on?
I applied it to the back of the red wall, blue roof and green floor pieces, ironing it into place with a fairly cool iron. If your felt is thick/stiff, you may not need any.
so just to the parts that actually make the house and not the parts that fold in? do you have to glue the other side of the interfacing? sorry ive never done anything like this
That’s right. I just glued the interfacing side of the house pieces to the main part. (Ask away – I’m happy to help)
Your tutorial is so great! I just have a great fun to brainstorm the components and compose them with my boy. He love that very much! It is very easy and full of fun! Thanks for the sharing!
Thank you very much! I did it!
I made one based on your tutorial, and have another in the making. The one I made was for my niece and has a ‘my little pony’ theme on the inside. The other ne, I plan on making similar to the one you have here for my son and his cars. I would love to share a picture if you are interested. Let me know.
Thanks for the extremely helpful tutorial here. The house/mat turned out great and everyone loved it.
It sounds amazing. I’d love to see photos. Please send them to Narelle@cookcleancraft.com Thanks!
has anyone made a farm themed playmat to give me ideas ..I am so HAPPY i found this tutorial,,Big Thank You