Elsa’s Ice Palace Birthday Cake
The next project from my daughter’s Elsa party is the cake. She requested a Dolly Varden-style cake, but Elsa Barbie dolls are hard to find, so I decided to make an ice palace birthday cake (on top of the North mountain).
Let’s start by saying, this is a Frozen-themed cake, but it is not a frozen cake. I wasn’t brave enough to attempt an ice cream cake!
I bought the character figurines from eBay (and now my daughter plays with them as a bonus birthday present), and the candles and Happy Birthday sign were from Big W.
I posted a photos on Facebook and Instagram as I was making the cake, but here’s all the details:
A couple of days before the party, I made toffee for the ice shards/palace. It was as simple as boiling sugar and water together, until it reaches the hard crack stage, and pouring it onto baking paper. I fiddled with it a bit too much and it ended up a little cloudy, but I liked how it turned out. The recipe’s at the bottom of this post.
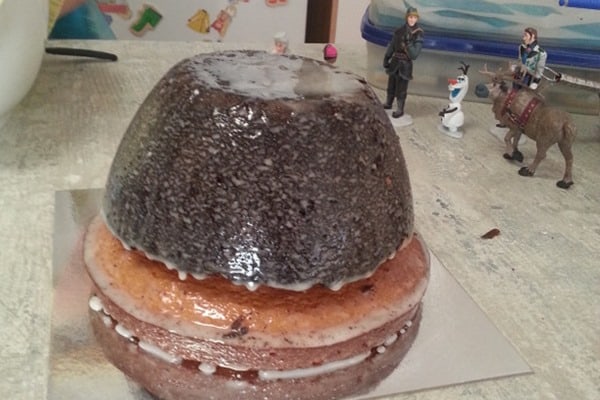
The cake was a white chocolate mud cake. I baked it in a pudding steamer. I had some leftover mixture, so I popped that in a round cake pan. With the almost spherical proportions of the pudding steamer, the cake ended up a dark crust but was wonderfully moist on the inside. Next time, I’ll wrap a towel around the pudding steamer to try to minimise the crust.
I wasn’t planning on this being a layer cake, but the round cake size fitted perfectly with the bottom of the pudding steamer. So I sliced off the top of the pudding cake and put it upside down on the round cake.
I was determined to decorate the cake properly this time, so I started with a crumb coat. This is simply a runny mixture of icing sugar and water. I spooned and brushed this over the cake allowing it to drip down the sides. This seals the outside of the cake and prevents crumbs getting into the buttercream.
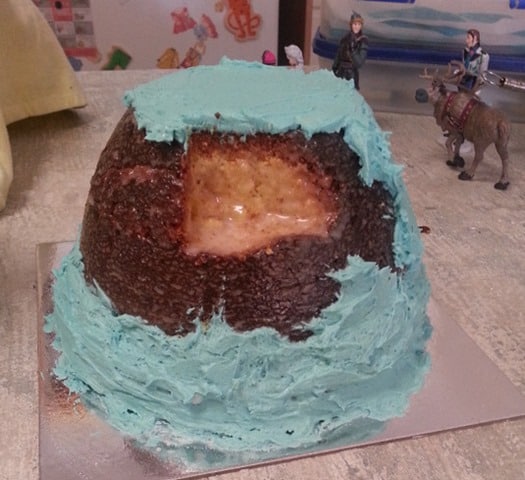
After leaving the crumb coat to dry, it was time to add the buttercream. There are plenty of recipes for this online. As I was putting the buttercream on, I decided I needed a platform for Olaf to sit on. I carved out a little section of the cake (see the photo below) added a bit more crumb coat to the cut section.
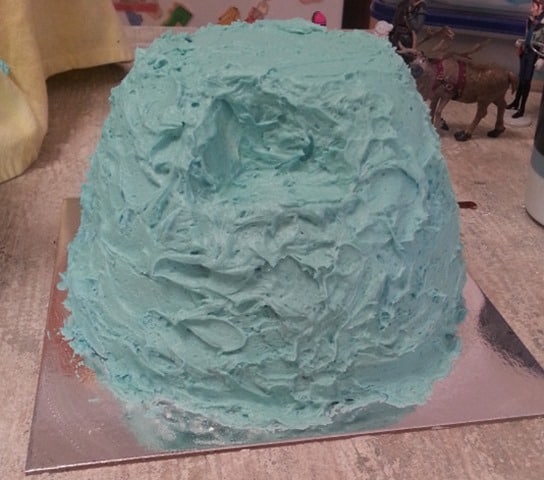
Then I continued adding the buttercream, smoothing it on with a spatula but still leaving it quite rough to give the mountains some texture.
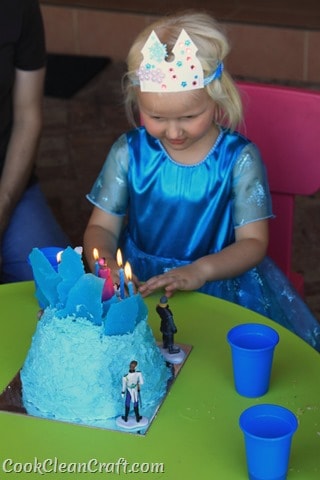
Then it was time for the decorations. I gently placed the ice shards into the cake so they didn’t break (OK, some broke and naughty words were said!). I ended up building a little bit of buttercream around the base of the ice shards, to hold them into place. I also put buttercream on the base of Kristoff and Sven, to hold them on the board.
You may notice Prince Hans lurking in the background. My daughter didn’t want him on the cake (since he was so mean), but I ended up sticking him on the back of the cake board.
It was at this point I realised I hadn’t left space for the candles, and my cake board wasn’t wide enough to put them along the bottom. So I wiggled Anna and Elsa around to create a little bit of space on top. Elsa’s snowball still ended up getting a little bit singed!
I also ended up adding an extra shard of ice (toffee) at the back which made it look more balanced.
My daughter was so happy with it (and I was pretty chuffed too)! To clean the pan, just add water and heat it up. The toffee remnants will dissolve.
Ice Shards Toffee Recipe

Ingredients
Instructions
Notes
Check out all the details of the Frozen Party here. For more fun projects, sign up to the Cook Clean Craft newsletter.


Great idea & great pictures.