Sparkly Christmas “Shir” Dress
A while back, when shopping in my Spotlight, Celeste fell in love with this glittery Christmas tree fabric:
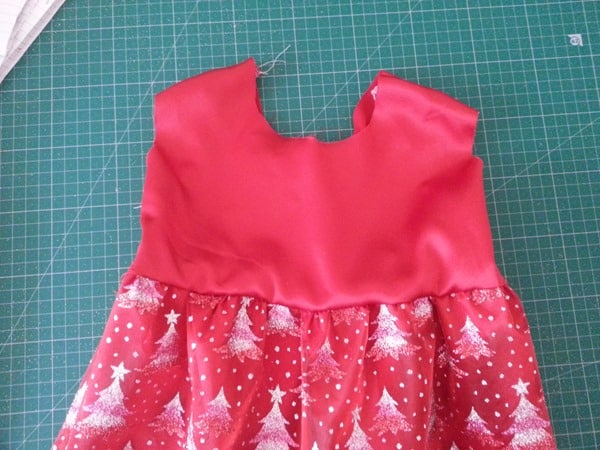
I must have been in a “keep the child happy, so I can buy more fabric” mood, the bolt ended up in the trolley, thinking it would make a cute Christmas dress. I bought some red dance satin, and after a good sewing session, the Sparkly Christmas Shir dress was created:
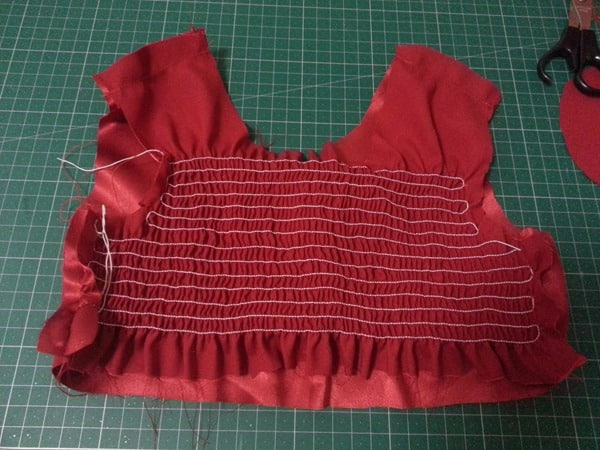
Making it fast became an exercise in how not to construct a dress. I had an idea in my head of what I wanted the dress to look like – sleeveless bodice with shirring in the back only and a gathered, lined skirt. I wasn’t really sure how to do a shirred back bodice with a “normal” bodice pattern. I didn’t want straps, I didn’t want the standard rectangle etc. So I started by cutting out a bodice pattern and widening the back piece a bit. Would it be big enough? I wasn’t sure, so I did the shirring first (really? What was I thinking?).
The back bodice piece looked pretty good, so I sewed it to the front bodice and then moved onto the skirt. For some crazy reason, I decided to sew the seam of the outer layer and lining together all at once. With there only being one seam (I didn’t make it very full because the glitter Christmas trees fabric is fairly stiff and doesn’t gather well), I lined that up with one of the side seams on the bodice. That means on one side the sheer fabric flounces out and on the other it sits flat against the lining, looking a little odd if you take the time to notice.
Then I thought, how am I going to finish off the neck and armholes? Ummm, kind of leaving that to the last minute! I know, I’ll line the bodice. But how am I going to keep the stretch of the back bodice? Well, I’ll just cut the same sized bodice as I did for the shirred piece and hope it sorts itself out on the inside! Luckily, it did mostly, with just a bit poking out at the armholes. If I had any sense, I would have sewn and lined the bodice before shirring. Maybe I’ll learn for next time!
Finally, I realised I hadn’t thought about hemming, and the two skirt layers were sewn together at the side seam. (Yep, this was really starting to become a comedy!) A little bit of seam ripping, and I managed to put double-fold hem on the lining and did a rolled hem for the sparkly Christmas trees. I didn’t need to hem it since the fabric doesn’t fray, but it looks more finished off.
So the Christmas dress is done! Just don’t look too closely at it (and I’m sure my Mum will on Christmas Day – oops!). One Christmas outfit done, one more to blog about.
Do you make special Christmas outfits for your kids?


